- July 14, 2017
- Posted by: SouTech Team
- Category: Website Design Service Abuja, Website Design Training, Website Hosting, Wordpress Website Design Training
HOW TO INSTALL WORDPRESS THROUGH CPANEL – SOUTECH WEB CONSULT
WordPress still remains the most uses Content Management System (CMS) with the largest share market amongst other CMS. It also has good number various themes and plugins both free and premium with can be used in building amazing websites. Developers around the world voluntarily provide support and development to the open source project on daily basis. WordPress has been used to build sophisticated and robust websites around the world. With the development of various plugins and frameworks, WordPress has been able to power portals, intranet, forums and e-Commerce websites.
However, if you are new to WordPress, you might find it difficult to install it into your cpanel. There are two known ways of installing WordPress; you can install WordPress by uploading a downloaded copy into you cPanel or install it directly from your cPanel using Fantastico of Softaculous Apps Installer. This article will focus on installing WordPress directly from cPanel using Softaculous.
This article require that you already have a registered domain and a valid hosting account of which you have the login credential.
Softaculous Apps Installer
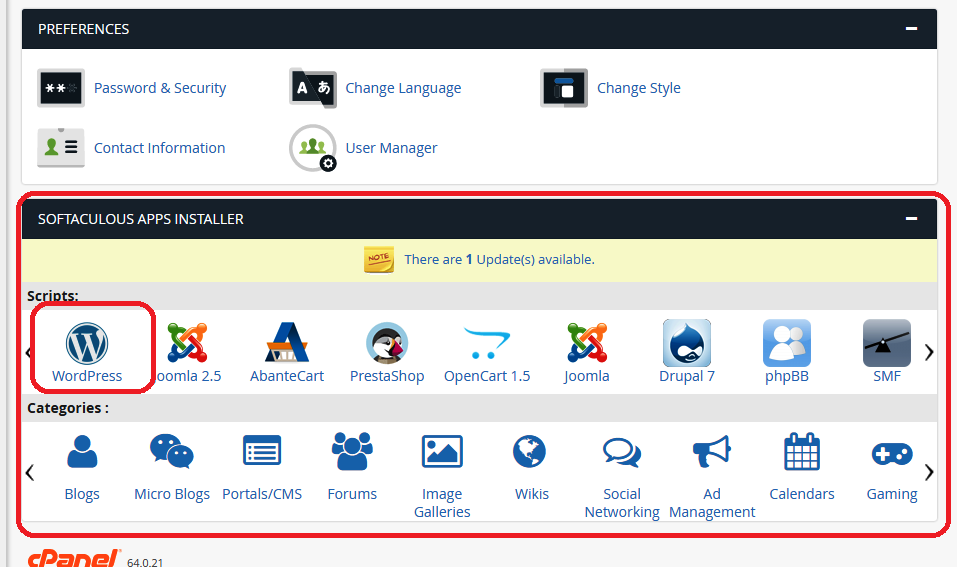
The first thing you want to do is to login into cPanel account and locate section with title “SOFTACULOUS APPS INSTALLER” as highlighted above. Click on WordPress as highlighted above.
WordPress
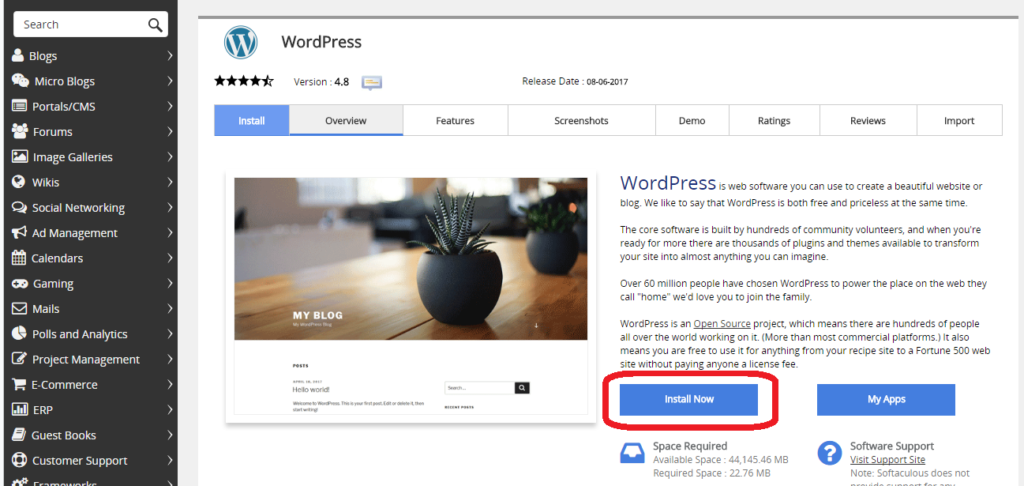
The WordPress Application screen will load as seen above, click on the install button as highlighted above.
The next dialogue page is where you want to input all website information.
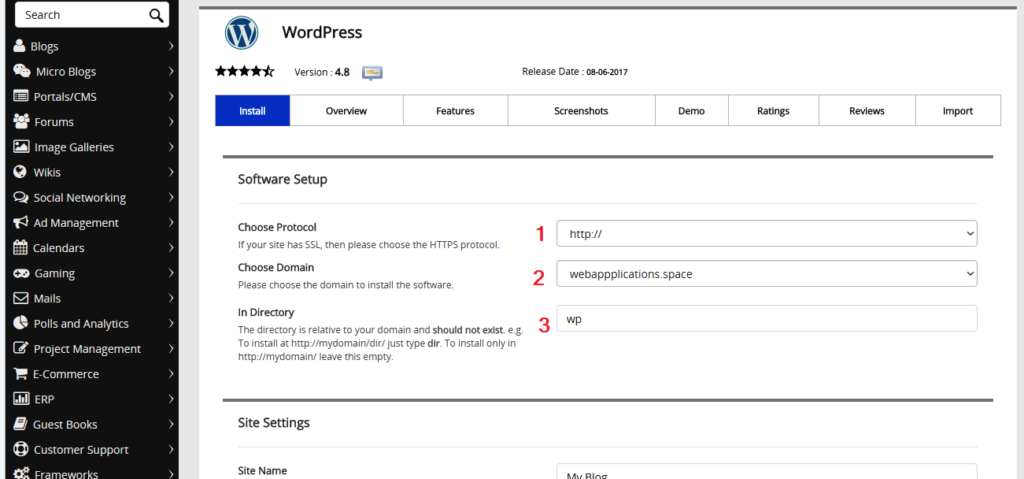
- Choose Protocol: leave this at “http://” except you have SSL installed then you can change it to “https://”
- Choose Domain: if you have subdomains, you need to tell WordPress which of them you want to use otherwise it will install in your default domain.
- In Directory: very tricky to some folks, you don’t need have anything in this field, it should be blank. Remove the “wp” pre-text there, else your website will be pointed to “http://yourdomain.com/wp” .
Site Settings and Admin Account
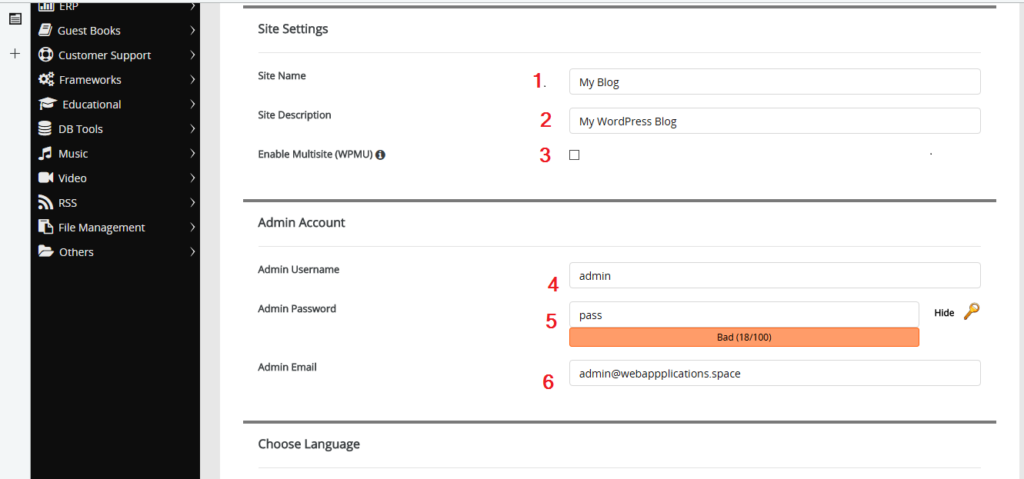
Site Settings: This section allows you to input your website name and description. Site name is not domain name as most newbie thinks. For instance; if my domain is Soutechventures.com my website name could be “Soutech Ventures” or “Soutech Web Consult” and description could be; Learn website design, mobile applications, digital marketing, certified ethical hacking and web development ”
Do not enable multisite except you have multiple WordPress website to manage.
Admin Account: Here you choose a desired username for the administrator. (Do NOT use admin as username for security reasons.) Choose an admin password that is strong enough to at least %60. (A good password is a combination of numbers, alphabets and special characters).
Admin Email: Now this happens most times; you just forget your password for reasons unknown, the email address you entered here will be required if you forget your password and trying to get a new one.
Language, Plugins and Advance Options
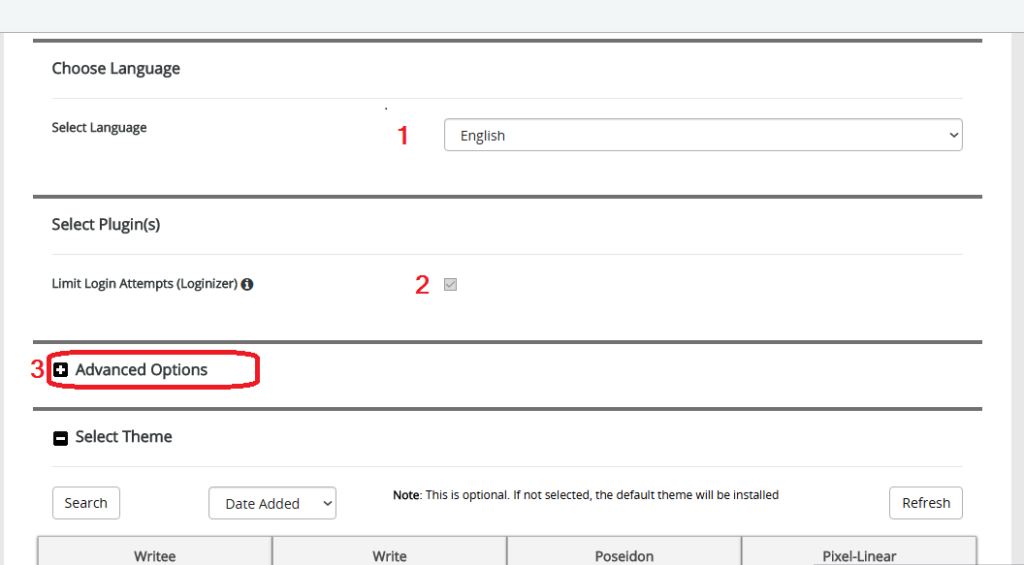
Choose Language: allows you to chooses the desired language for your website.
Select Plugins: Plugins will be installed automatically by the app installer.
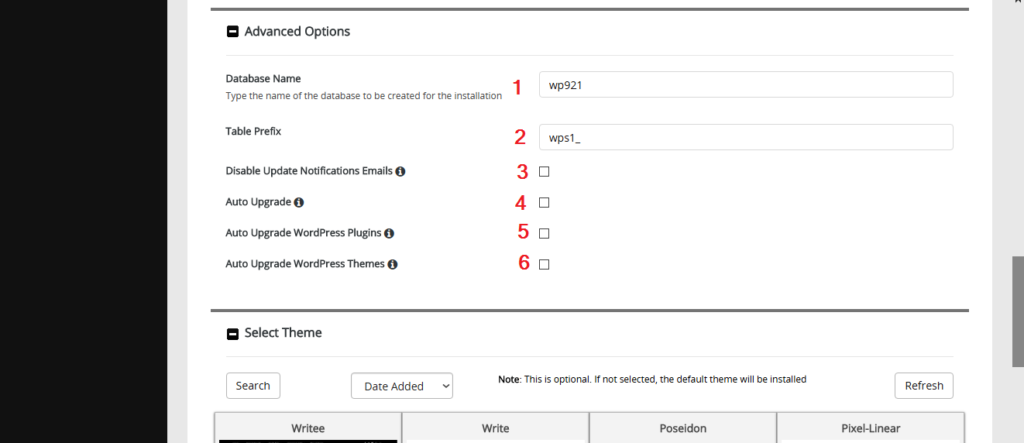
Advanced Options: Click the little “+” sign to toggle it open. Many people always ignore this section, maybe due to the fact that it is not toggled open. But it is important to know the name of the database you will be making use of especially if you are going to have more than one database. If eventually something go wrong and you need to update or drop the database manually using “phpMyadmin” you must need to know which database you have to update or drop you do not want to alter the wrong database.
Advanced Options:
Database Name (1) and Table Prefix (2): Choose a desired name for database and table prefix. Do not forget to add an underscore “_” after table prefix. So if you want to use sou001 as table prefix, it should be “sou001 _” . (A good way to keep database hidden and protected is to use a combination of alphabets and numbers). Note: database should not exceed 7 characters.
Disable update notification emails: do not thick this box except you do not want WordPress to notify you of recent software and security updates.
Auto upgrade, Auto upgrade WP plugins and Auto upgrade WP themes: do no thick any off these. It is not that you will not upgrade. Setting it on auto is not advisable, new upgrade may have conflict on themes or plugins, which might mess up your website. You can always upgrade from your dashboard, when it has been tested and stable.
Finalising
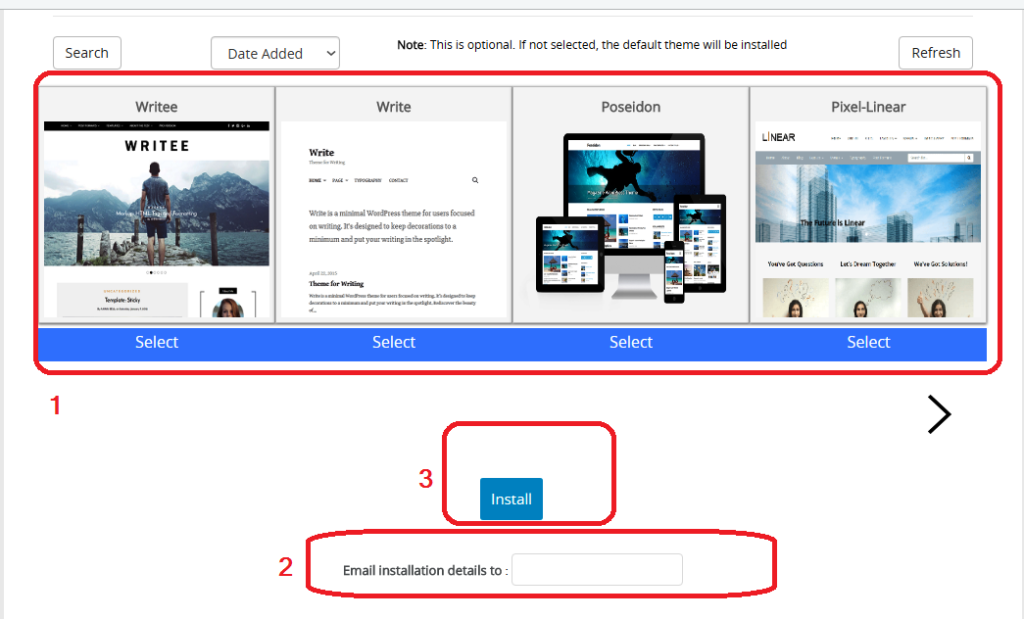
As highlighted on (1) above, Softaculous has added an option that allow you to choose a free theme that will be installed automatically with you WordPress application. However, you can still install themes from your dashboard.
Email installation details to: Optionally, you might want to have a copy of the installations details sent to your email.
Install: hitting the install button will then installed WordPress on your chosen domain name.
A congratulations page will load displaying your website link and the link to login to your dashboard.
I hope this guide was helpful.
Remember you can be an expert in building WordPress websites within few days of training and few weeks of practice. Enroll for a website design training at Soutech Web Consult, Kano Street, Area 1, Abuja.
Grab a copy of our comprehensive training kit. Call today.

