- July 26, 2021
- Posted by: team SOUTECH
- Category: Blog, Blogging, CEH, CISCO, CISSP, cyberOps, Ethical Hacking and Kali Linux Free Training, Others, Security, Wireshark

Introduction
In this lab, you will create and modify user accounts in Windows.
Part 1: Creating a New Local User Account
Part 2: Reviewing User Account Properties
Part 3: Modifying Local User Accounts
Required Resources
- A Windows PC
Instructor Note: Provide students with a user account name and password to be created in this lab.
Instructions
Part 1: Creating a New Local User Account
Step 1: Open the User Account Tool.
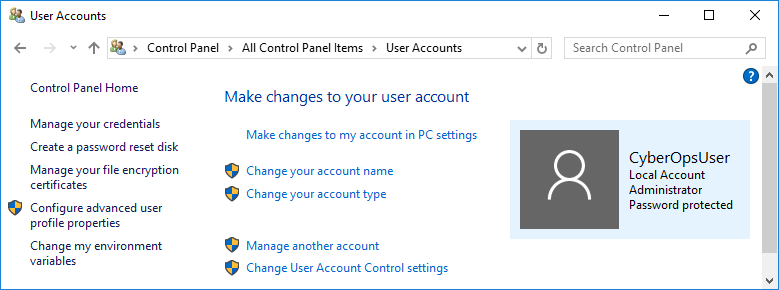
- Log on to the Windows PC with an Administrator account. The account CyberOpsUser is used in this example.
- Click Start > search Control Panel. Select User Accounts in the Small icons view. To change the view, select Small icons in the View by drop down list.
Step 2: Create a user account.
- In the User Accounts window, click Manage another account.
 In the Manage Accounts window, click Add a new user in PC settings.
- In the Settings window, click Add someone else to this PC.
- In the How will this person sign in? window, click I don’t have this person’s sign-in information.
- In the Let’s create your account window opens, click Add a user without a Microsoft account.
- In the Create an account for this PC window, provide the necessary information to create the new user account named User1. Click Next to create the new user account.
Question:
What type of user account did you just create?
A local account with no administrative rights
- Attempt to log into the newly created user account. It should be successful.
- Navigate to C:\Users Right-click the User1 folder and select Properties, and then the Security tab.
Question:
Which groups or users have full control of this folder?
Groups: SYSTEM, Administrators Users: User1
- Open the folder that belongs to CyberOpsUser. Right-click the folder and click the Properties
Question:
Were you able to access the folder? Explain.
You do not have permission to access this folder.
- Log out of User1 account. Log back in as CyberOpsUser.
- Navigate to C:\Users Right-click the folder and select Properties. Click the Security tab.
Question:
Which groups or users have full control of this folder?
Groups: SYSTEM, Administrators Users: CyberOpsUser
Part 2: Reviewing User Account Properties
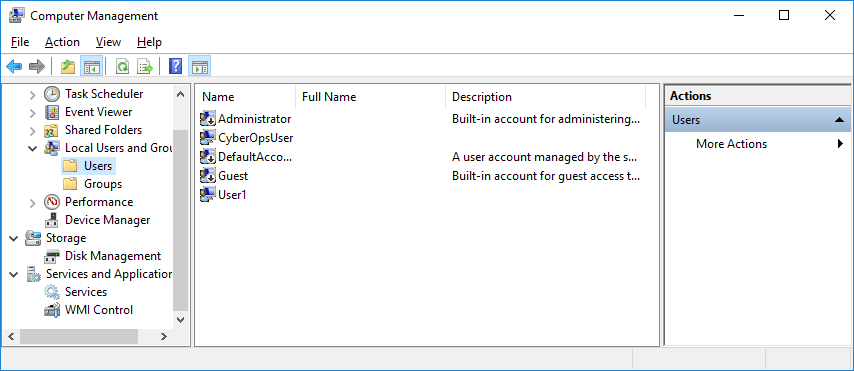
- Click Start > Search for Control Panel > Select Administrative Tools > Select Computer Management.
 Select Local Users and Groups. Click the Users
 - Right-click User1 and select Properties.
- Click the Member Of
Question:
Which group is User1 is a member of?
Users
- Right-click the account CyberOpsUser and select Properties.
Question:
Which group is this user a member of?
Users and Administrators
Part 3: Modifying Local User Accounts
Step 1: Change the account type.
- Navigate to the Control Panel and select User Accounts. Click Manage another account. Select User1.
 In the Change an Account window, click the User1 Click Change the account type.
- Select the Administrator radio button. Click Change Account Type.
- Now the account User1 has administrative rights.
- Navigate to Control Panel > Administrative Tools > Computer Management. Click Local Users and Groups> Users.
- Right-click User1 and select Properties. Click Member Of
Question:
Which groups does User1 belong to?
Administrators and Users
- Select Administrators and click Remove to remove User1 from the Administrative group. Click OK to continue.
Step 2: Delete the account.
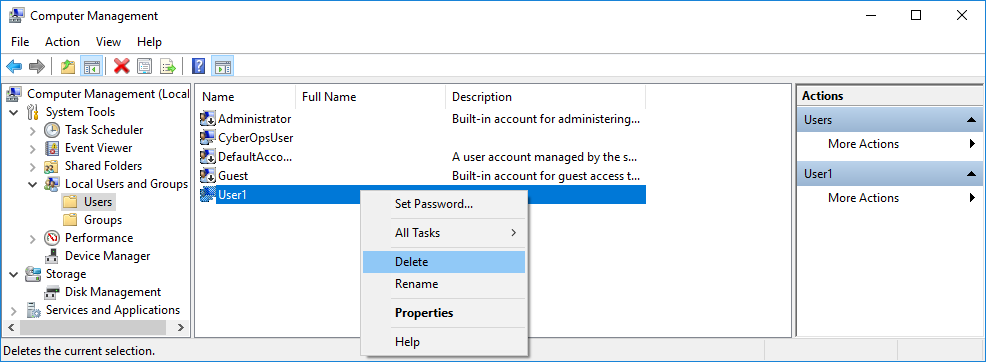
- To delete the account, right-click User1and select Delete.
- Click OK to confirm the deletion.
Question:
What is another way to delete a user account?
Control Panel > User Accounts > Manage another account > Select User1 > Delete the account
Reflection Questions
- Why is it important to protect all accounts with strong passwords?
No password or a weak password can allow access from almost anyone to steal data, or use the computer for unauthorized purposes.
- Why would you create a user with Standard privileges?
The Standard User cannot compromise the security of the computer or the privacy of other users.


